Sunday, 15 November 2015

Sight Word Tracking & Assessing

Keeping track of sight words has been a lot easier with my Sight Word Track & Assess tool.

https://www.teacherspayteachers.com/Product/Sight-Word-Tracking-and-Assessment-2208073
Click on the picture above to check it out on TPT.

There are three different ways this can be used;

1) Track on a whole class sheet
2) Track on individual assessment sheets
3) Track on a whole class sheet and an individual sheet

I prefer doing option 3. Yes, it means more work for me, but it means that at the end of the year, I'll have a sheet which I can pass onto the next teacher so that they don't have to start again from scratch. It also means I can easily see trends on the whole class sheet to plan my guided sessions.

Here's a peek at whats included in the pack;

Whole class tracking sheet
Boxes are highlighted when students can read the word. I use a different coloured highlighter each time to show progression. I record the key at the top of the page.

I love this, as it's easy to see which words need to be taught/retaught and any common patterns.

Flashcards


I prefer holding flashcards up rather than having students read of the sheet. I find that some students become overwhelmed when they see a sheet full of words. Print on coloured card if you want to sort them into different levels or look a bit more exciting than plain white.

Individual Assessment Sheet


This can be used to keep a record that can be passed onto the next teacher. Hold up flashcards and highlight if the student can read the word. Once again, use a different coloured highlighter if you want to track progression.

Click on the picture below to find it on TPT.

https://www.teacherspayteachers.com/Product/Sight-Word-Tracking-and-Assessment-2208073

Thursday, 12 November 2015

Guided Writing

This year has been a big learning curve for me in terms of teaching. The school I'm at has had a big focus on 'guided groups', which has changed the way I teach.

I've been experimenting with Guided Writing Groups. I'm no expert on the subject but so far, I have seen a big growth in my students writing. Here's how I run guided writing in my classroom.

#1 - Plot students on the 'Aspects of Writing' section of the Literacy Continuum
In NSW, we have a Literacy Continuum. We use this to track student progress and see the 'where to next'. This helps us plan and develop activities which target specific needs.

#2 - Group students according to where they sit on the continuum.
Once students have been plotted, I form my groups based on what 'cluster' they're at.

#3 - Develop a goal
I then look at the 'where to next' and choose a point to focus on. For Kindergarten the goals for the year are;

I can leave spaces between the words (cluster 2)
I can use capital letters and full stops (cluster 3)
I can sound out words that I don't know to help me write them (cluster 3 & 4)
I can correctly spell sight words (cluster 4)
I can write more than one sentence (cluster 4)
I can add detail to my sentence by using adjectives (cluster 5)

I have these on display as a step chart. Student names are on a pencil and the pencils are moved according to what goal they are working on.


#4 - The Session - No more than 4 students
What we write about depends on what we are learning about at the time.

I use a log book to take notes and keep track of what we have covered.


The log book has a space at the top for the group goal and space for anecdotal notes on what writing behaviours each student displays. At the end of the week, once all sessions have been complete, I look back over the notes and make any necessary adjustments to groups or goals.

In the session I provide each student with targeted support. Having a small group means that I am able to provide individualised support for each student.

Once students have completed their writing, I mark their work with them. I have a rubric that relates to each goal;


I refer to this rubric when marking and giving feedback. Usually the number of ticks or stamps refers to how well they've achieved their goal ("working towards", "almost there" and "I've got it"). I've also developed a tracking sheet (right image) to use for next year to help keep my student portfolios neater.

That's pretty much it. If you're interested in the pack, you can find it by clicking here or on the picture below :)

https://www.teacherspayteachers.com/Product/Guided-Writing-2202497

Visual Word Wall

The visual word wall has always been the most used 'interactive' wall in my classroom.

What is a visual word wall and how does it differ from a word wall? The cards have a picture to match the word. This assists students in finding the word that they are looking for. Working in a school with a high population of ESL students, I can't ever imagine using a word wall with no visuals.

Here are some pictures of my Word Wall over the years;


These aren't neat because these walls get used everyday. Let's be honest no working word wall is ever going to stay tidy!

I've had different ways of organising the cards; no organisation, nouns/verbs/adjectives and alphabetically. Overall my favourite way is the alphabetical method. This saves a LOT of time when finding words and aids in reinforcing letter/sound relationships. 

Sorting the cards alphabetically also lends itself to playing fun games such a word hunt - say a word and have students find it on the word wall.

The word cards are based on words that students would use most often. I update the cards when I see a common need or when words keep popping up in student writing.

Check out my Visual Word Wall by clicking the picture below. The cards with items like iPad, PlayStation and Mc Donald's are not included. However I've left blank cards in the product if you would like to make your own for use in your own classroom.


https://www.teacherspayteachers.com/Product/Visual-Word-Wall-2202315

Monday, 9 November 2015

Comparing Numbers

It's nearing the end of the school year here in Australia, so one thing that we've all been doing is going through the syllabus and making sure that we've covered each content strand.

Looking through the syllabus, the team all agreed that we needed more work on the strand; comparing numbers to determine 'how many more'

As a team, we decided on the best way to teach this concept and that this would be the modelled part of our guided maths session.

#1 - Get two groups of objects (can be counters, unfix cubes, etc).

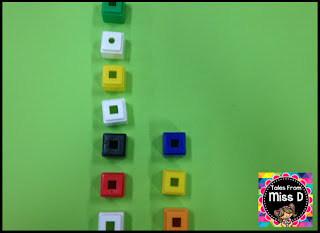
#2 - Line up objects side by side, making sure the objects match/have a partner.

#3 - Look at where the matches stop and separate the objects that don't have a partner.

#4 - The objects that don't have a partner tell us 'how many more' are in the group.

When introducing the concept, stick to examples that don't have a huge difference i.e do 7 and 4 not 5 and 20. Keep it simple with small differences. Work on larger differences in the guided group part.

Of course, I want my students to be applying this independently while I am working with my small groups, so I made two centers that work on developing this skill.

Activity #1


In this activity, students pick a card and place that many counters/cubes on the top row. They pick another card and place that many counters/cubes on the bottom row. They then look at where the matching stops to determine 'how many more' and write the number at the bottom.

The grid is a great way for students to make sure the objects are lined up properly. If the objects are not lined up, then this strategy falls apart.

Activity #2
In this activity, students pick a card and make towers that correspond with the numbers. To find out how many more, students break the tower so that they become even. The amount broken off will reveal 'how many more'.


Students can then write the answer on the line.

Very simple, yet effective activities for students to develop this skill. You can find this product by clicking on the picture below :)

https://www.teacherspayteachers.com/Product/Comparing-Numbers-2191590


Enjoy the rest of your week!