Digital resources have become the norm, this doesn't have to be scary and it doesn't mean we can no longer use the fun and engaging resources we used to use in our classrooms.
I've been creating lots of digital slides to adapt to this change and have been receiving lots of questions about how to use them on various platforms. Here is a step by step tutorial for assigning slides on Google Classroom. This tutorial works for any slideshow resource that has permission for online use.
Step #1 - Prepare the file for assigning
Some files are ready to go and some files require a small amount of prep. This can range from deleting the first few credit pages, duplicating pages and creating additional questions.
Step #2 - Create the task and assign
Click on 'Classwork' at the top
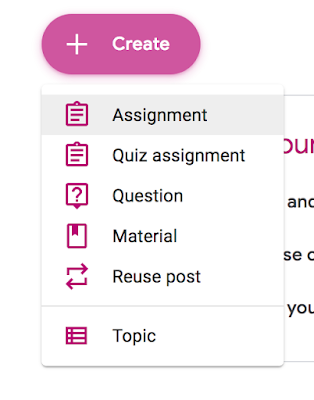
Click 'Create' and then 'Assignment'

Fill in the fields. You can choose to leave the instructions field blank, I like to give students instructions on how to edit the file in Google Slides.
Make sure you choose 'Make a copy for each student'!
Now you've assigned your slide, it's time to get students using and submitting their work.
The tasks should appear in the class stream. Students can click on the task on the stream or by clicking on 'Classwork' at the top.
When students click on the task, they should see this. 'Tales From Miss D' will be replaced by the student's name.
Step #1 - Click on the file listed under 'Your Work'
This will open the file in 'View Mode'
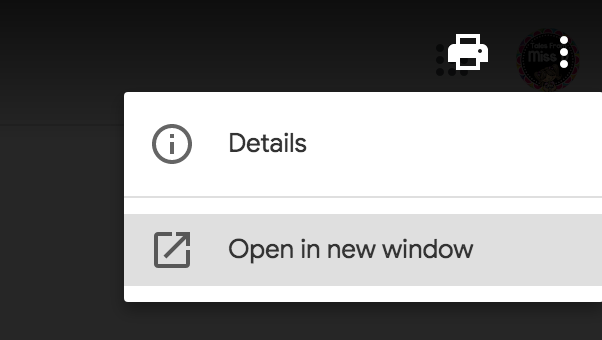
Step #2 - Click on the three dots in the top, right corner and choose 'Open in a new window'
The file will then open in a new tab.
Step #3 - Click 'Open with Google Slides' at the top
This will open the file in a new tab, in Google Slides where the students can complete the activities.
Student work should save automatically as they are editing the slides.
Step #4 - Submitting Work
Once complete, students can close the file by closing the tab. They return to the original screen which looks like this;

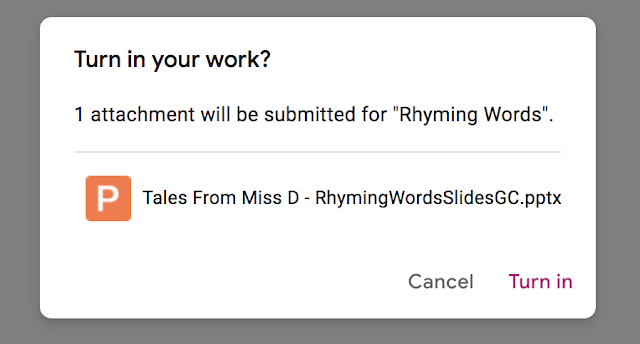
To submit the work, students click 'Turn In'. A confirmation will pop up;
Students click 'Turn In' and the work will be submitted for you to view.
Once you've used this a few times, you and your students will become masters at Google Classroom. I've become a fan of digital tasks and can see myself continuing to use these even when we go back to 'normal' routine.
I hope this tutorial has helped you, as always if you have any questions, please reach out via any of my social media platforms and I will do my best to answer any questions.
Happy teaching,


My husband was diagnosed with Creutzfeldt-Jakob Disease (CJD) four years ago. For over two years, we relied on prescription medications and therapies, but unfortunately, his symptoms continued to worsen. His memory,coordination, and overall strength declined, and everyday life became increasingly difficult.Last year, out of desperation and hope, we decided to try an herbal treatment program from NaturePath Herbal Clinic. Honestly, we were skeptical at first, but within a few months of starting the treatment, we began to notice real changes. His alertness improved, his movements became steadier, and he regained a surprising amount of energy and clarity.Incredibly, he also regained much of his independence and confidence. It’s been a life-changing experience he feels more like himself again, better than he had in years.If you or a loved one is struggling with CJD, I truly recommend looking into their natural approach. You can visit their website at[www.naturepathherbalclinic.com]info@naturepathherbalclinic.com
ReplyDelete