Showing posts with label technology. Show all posts

Monday, 13 April 2020

Using Digital Slides on Google Classroom

The way we teach and set up classwork has changed dramatically since the start of the year. We've been forced to adapt to going digital and use platforms in ways that we've never used them before.

Digital resources have become the norm, this doesn't have to be scary and it doesn't mean we can no longer use the fun and engaging resources we used to use in our classrooms.

I've been creating lots of digital slides to adapt to this change and have been receiving lots of questions about how to use them on various platforms. Here is a step by step tutorial for assigning slides on Google Classroom. This tutorial works for any slideshow resource that has permission for online use.


Step #1 - Prepare the file for assigning
Some files are ready to go and some files require a small amount of prep. This can range from deleting the first few credit pages, duplicating pages and creating additional questions.

Step #2 - Create the task and assign
Click on 'Classwork' at the top
Click 'Create' and then 'Assignment'

Fill in the fields. You can choose to leave the instructions field blank, I like to give students instructions on how to edit the file in Google Slides.

Make sure you choose 'Make a copy for each student'!


Click 'Assign' and you're done.

Now you've assigned your slide, it's time to get students using and submitting their work.

The tasks should appear in the class stream. Students can click on the task on the stream or by clicking on 'Classwork' at the top.

When students click on the task, they should see this. 'Tales From Miss D' will be replaced by the student's name.
Step #1 - Click on the file listed under 'Your Work'
This will open the file in 'View Mode'

Step #2 - Click on the three dots in the top, right corner and choose 'Open in a new window'

The file will then open in a new tab.

Step #3 - Click 'Open with Google Slides' at the top

This will open the file in a new tab, in Google Slides where the students can complete the activities.

Student work should save automatically as they are editing the slides.

Step #4 - Submitting Work
Once complete, students can close the file by closing the tab. They return to the original screen which looks like this;


To submit the work, students click 'Turn In'. A confirmation will pop up;

Students click 'Turn In' and the work will be submitted for you to view.

Once you've used this a few times, you and your students will become masters at Google Classroom. I've become a fan of digital tasks and can see myself continuing to use these even when we go back to 'normal' routine.

I hope this tutorial has helped you, as always if you have any questions, please reach out via any of my social media platforms and I will do my best to answer any questions.

Happy teaching,

Saturday, 28 March 2020

Using Seesaw for Distance Learning

Have you switched to Distance Learning recently? Did you know you can still use your favourite class activities online using Seesaw?

Here's a simple tutorial to get you started.

1) Open your Seesaw account

2) Click on the green 'Add' button


3) Choose 'Assign Activity'


4) Click 'Create New Activity'

5)  Type the title and any instructions you wish to add

6) Under 'Student Template', click 'Add template for student responses'


7) Choose 'Upload' and select your PDF file

8) Choose 'Other Locations' and select your .PDF file


9) The .PDF file should open. You can delete any unwanted pages by pressing on the three dots in the bottom right corner of the page previews.


10) When you're ready, click the green tick.

11) Press 'save' at the bottom.


12) Then press 'Assign' and choose your class.

13) Activities for your class can now be found by pressing the activities tab.


Students will be able to respond by drawing, typing and even recording their voice!

Here are some examples using some of my printable .PDF resources;


Past, Present and Future Tense


Editing Sentences


120 Chart Fill In

I hope this tutorial has helped you set up some activities for your class.

Happy teaching!

Monday, 8 January 2018

Using my Teacher Planners Digitally

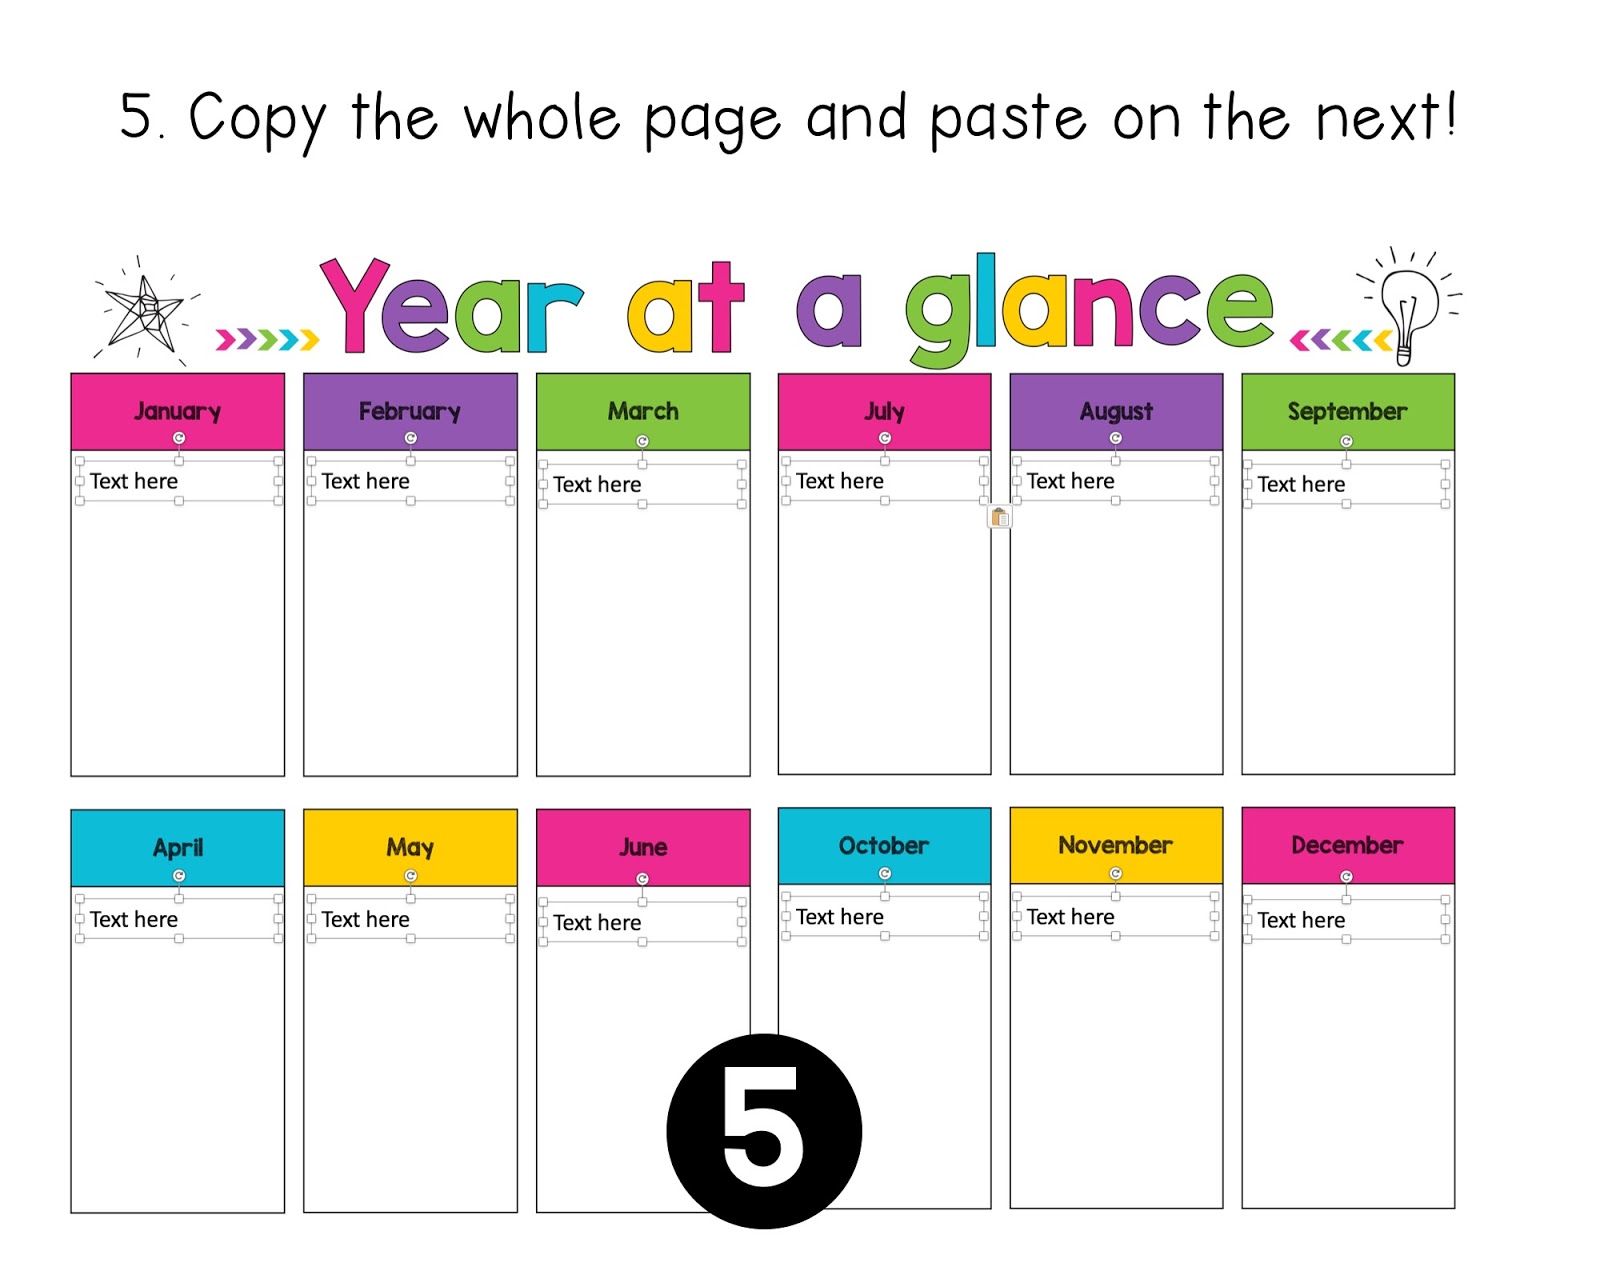
One of the most frequently asked questions I get about my teacher planners is whether they can be used digitally and if so how to set it up. I have not inserted text boxes as some would like to use it as a print and write planner and placing "text here" boxes would interfere with the printing. In order to use my planners digitally, you will need to insert your own text boxes. This might seem like a daunting task, but with these tips and tricks it's not as time-consuming as you would think.

Copy and Paste is your best friend!

A lot of the boxes are the same size and in the same position on each page, so once you have one page set up with the boxes, you can simply copy the text boxes and then paste them onto the next page.


Choosing the right font size

With a table, you can still use a text box and hit enter to move to the new lines. The key to this is choosing the right font size.


If your table has more than one column, simply copy and paste the text box across.


Alignment Lines

One of my favourite things about PowerPoint is the alignment lines that come up when you are dragging items around. These are super useful for making sure that things are lined up properly and evenly spaced.


Here is a visual on how to set up the weekly pages.


I hope this helps you in setting up a digital version of your planner. As always if you have any questions please send me an email or leave a question on my TPT Store!

Sunday, 12 June 2016

Keeping Centers Under Control


Center work happens in my classroom every day. Together, my students and I have been working pretty hard on our routine since the beginning of the year. At this stage of the year, most of my students have grasped the concept of working independently. Though, there are still a few students who need extra guidance. I'm going to share my top 3 tips that have had results :)

#1 - Noise Meter
These have been around for a while but they are very effective!

Here are my two favourites;


These tools both work the same way, they use your computer's microphone to pick up on the noise level and the graphics on the screen move depending on how noisy the students are.

I have been using Calm Counter. Students must keep the arrow out of the red zone. This has been a major help in keeping the noise level down during center time. As it is real time, students are provided with instant feedback on how noisy they are. It also means that they can monitor the level themselves rather than have me tell them to work quietly. Win!

There are also apps for iPads and smartphones which can be Air Played but I have not used them yet.

#2 - Good Choices and Poor Choices Sort
 Setting up expected behaviour choices is a must. I created a 'Good Choices' and 'Poor Choices' sorting activity with behaviours I had seen. As a class, we sat down and sorted these behaviours. I then stuck them on a coloured card to make a chart that is now displayed at the front of the room during center time.


I refer to this chart when needed. "What choice were you making? what choice should you be making?"

Check this out at my TPT store by clicking here or clicking on the image below.


#3 - Clip Chart
I know this has become a 'controversial' issue but I still have a clip chart in my room. I use this as a motivational tool.


Before we start our centers, I remind students that I am looking for students who are working hard, making good choices, working quietly, sharing and trying their best. At the end of the session, I go through and praise students and move them up the chart. When praising, I make sure I give specific feedback e.g. "I like the way x, was turning the pages carefully at the reading table". By giving specific feedback, it shows the students that I am watching what they are up to even though it appears that I am busy with my group. At the end of the day, students at the top of the chart are rewarded with Dojo Points. I also make sure to emphasise that those students who didn't move up or moved down still have a chance to move up in the next session. Positivity is key!

You can check out my Clip Chart by clicking here, or by clicking on the image below.


Enjoy the rest of your weekend!

Saturday, 17 January 2015

Technology You Should Try : PDF to JPG Converter

Today I'm sharing with you an awesome tool that can help fix printing issues with .PDF files!

Some printers have issues printing .PDF files made up of different layers. I've never had this problem with my home printer, it's usually the printers at work. It can be quite frustrating, especially if you keep wasting ink by trying to print the file over and over again.

I have found a nifty online tool that can help overcome this problem. It's called 'PDF 2 JPG' and it will convert the file to images for easy printing!

There are many .PDF to .JPG converters online. Here is the one that I will be talking about; PDF2JPG.

It's a fairly straight forward interface. Upload the file and select 'Excellent' for crisp printing quality. Press the 'Convert' button and wait.


It will then take you to the next page where you will be able to view and save your images. You can even download the images as a .zip file.


Then, you can easily print the document as image files. This should eliminate any printing issues as the file is now broken up into parts and no longer has layers :)  Of course, use this tool wisely and refrain from breaking any copyright laws.

Sunday, 19 October 2014

Digital Learners

Technology is everywhere. Homes, schools and out in public. I think it is very important that we teach our students how to be responsible while using technology. I feel very strongly about this as I have had my own issues with people abusing technology and it's something that no one should have to go through or put up with.

So here are three resources that can be used to help teach students about the safe and responsible use of technology :)

Resource 1 - Internet Safety

This resource covers the topics of;
1) What is the Internet and what is it used for?
2) What is Cyberbullying? What can you do about it?
3) What is Cyberharassment? What can you do about it?
4) Tips for Internet safety
5) Permanency of things posted online
6) Police involvement


I think there are some people out there who think that because things are done online, it's not as serious as it is not "real life". The thing is, technology has now become such a big part of everyday life, that things done online are in fact done in "real life". To use the excuse that "it doesn't matter because it's online" is ignorant and a pretty weak way to try and justify bad behaviour. It doesn't matter whether it's done in person or online; if it's wrong, it's wrong. No excuses. If you know you would get intro trouble for doing it offline, you can get in trouble for doing it online.


I also think that people are unaware of the fact that they can seek help from the police over cyber issues. I know for a fact that in Australia, the police can and will get involved over issues such as Cyberbullying and Cyberstalking. People may assume that the police have bigger issues to deal with, but the reality is that they are there to help us whether the issue be big or small. 


The issue of permanency is also a big one. I think this stems from a lack of understanding about what the Internet is and what it's made up of. Perhaps a good way of demonstrating this, would be to use two iPads and send a message between them. Have one person delete the message from one of the iPads and make a point about how it is still on the other iPad. Then show how the message can then be sent and uploaded to anyone.


Resource 2 - Digital Citizens

We are all digital citizens and the notion of Digital Citizenship is an issue that we come across in our classrooms when implementing online learning environments. We want our students to use technology effectively, so we must teach them how to use it effectively. 


This resource covers the topics of;
1) What is a Digital Citizen and how can you be a good Digital Citizen?
2) Don't be a Digital Pest (bad Digital Citizen)
3) Digital Footprints and how they can convey information about you


This resource would be perfect to use when setting up a class blog or Edmodo group.


Resource 3 - Cyberbullying

This is also a pretty big issue. Once again, I think people assume that because things are done online it's not as serious and they can get away with it.  

Included in this resource;
1) What is Cyberbullying? What are some examples of Cyberbullying?
2) What can you do about it?
3) Perspectives of a victim and a bully 


With this resource I wanted to get students thinking about the two perspectives; from the victim and the bully. So included in this resource are two stories. One from the victim of cyberbullying and one from a cyberbully. There are discussion questions which look at the feelings, actions and reasoning behind the actions. This also opens up a discussion about what students can do. 

By educating and making students aware of these issues, we can help prevent technology from being used in an abusive and negative way.

You can check out these resources by clicking here.

Enjoy the rest of your weekend!

Saturday, 11 October 2014

Back to School + FREEBIE

I've kind of neglected this blog over the past week or so. Whoops!

The school holidays are over now. I didn't spend that much time on the computer, hence the lack of posting. My goal for the holidays was to spend at least an hour each day doing something active outdoors. The area that I live in has quite a few parks and walking/bike tracks. So my boyfriend and I went for lots of walks, runs and scooter sessions. Our building has a pool too, so on the hot days we went swimming (i.e I learned to swim). It was nice being able to do things outdoors during the week. On weekends, it's always a bit hectic with all the bike riders and dog walkers.

Aside from doing outdoorsy things, I went shopping and bought an iPhone. I got the 5c in blue. I love it! Now I finally get to hear the magical Ka-Ching that all the teachers talk about on the forums :D

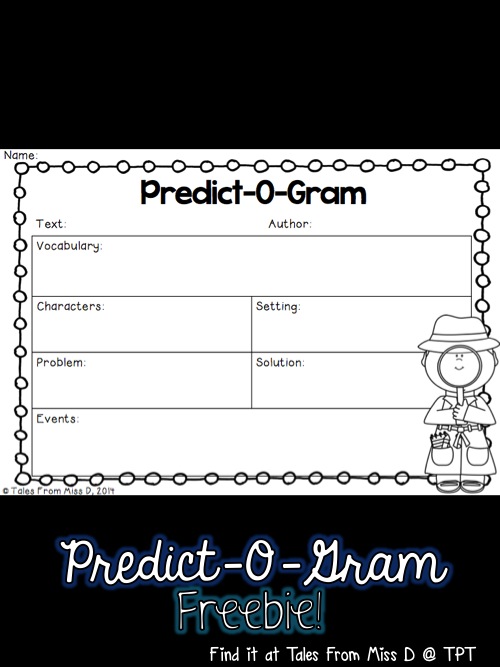
School is back for the final term of 2014. I am still working with the same classes and focusing on reading groups. This week, we started with new texts. One activity that we have been working with is a Predict-O-Gram. Click on the picture to get your own FREE copy on TPT! (celebrating 300 products freebie).

http://www.teacherspayteachers.com/Product/Predict-O-Gram-1492482
Before reading, we fill out the boxes. Students make predictions about the vocab, characters, setting, problem, events and resolution. After reading, we look back at the predictions and confirm or reject as well as discuss the similarities and differences. Great activity to get students thinking about the text!

Will try and find some time this week to add to my Comprehension series.

Enjoy your weekend!

Monday, 16 June 2014

Technology You Should Try : BooksApp

Want an easy way to keep track of all your books? Need a way to keep a portable list that doesn't involve tons of paper and time to create/maintain? Then I have the App for you!

Today I bring you this wonderful App called BooksApp. Click here to get it from the App Store. It's free for the basic version :)


When you first open the App it looks like this;
From here you can view your books as one big list or in more organised lists; series, collections, author, publisher or by subject. You can even track books you have loaned to your friends.

To get started click on the Books menu, it will take you to this screen.

Click on the plus to add a book to your library. You can choose a few different ways, the easiest is to use the Barcode Scanner. Though if the ISBN is not listed with the barcode it will not work and you will have to manually enter the ISBN.

As you can see, once the barcode is recognised, the title will appear. Click on done and the book will be added to your library.

If you click on a title, you can see detailed information about the book.


Once your books are added you can start adding them to series, collections and categories. Click on the pencil icon and this is what you should see...


Add in the categories you want and your collection will be a whole lot more organised!

This app does require an internet connection to add your books so I would recommend you use it with wi-fi and not a cellular connection as it can chew up your data.

If you like the app you can upgrade to be able to export your list to Google Drive. 

I Love this app, makes keeping track of things so much easier. Give it a go, you won't be disappointed!